Showing posts with label DIY. Show all posts

Monday, June 20, 2016

5 Trends Hotter than the Summer Sun

 
Fringe is In

This summer is all about fun in the sun, so add some fun textures to your wardrobe with fringe details. Go for a bold look with a heavily fringed top or add some subtle fringe with tassels dangling from your jewelry.

This look can also be an easy DIY. Find a great sweater or vest at your local Goodwill store, then add a few yards of fringe (found at any craft store), and instant style!


America, the Beautiful

With Fourth of July celebrations just around the corner, it’s time to bring out your stars and stripes! Go all out with a star spangled tank-top or add a flag detail to your favorite denim jacket.


Say Aloha!

Floral prints aren’t just for spring. Brighten up your look with bold hibiscus and tropical palm tree prints. 

Hawaiian print shirts are a great treasure that you are sure to find at your local Goodwill stores. Consider purchasing a men's large camp-style shirt in a great print and turning it into a skirt dress!

And yes, gentlemen, the Hawaiian shirt is back in style!

  
Relax, Take it Easy


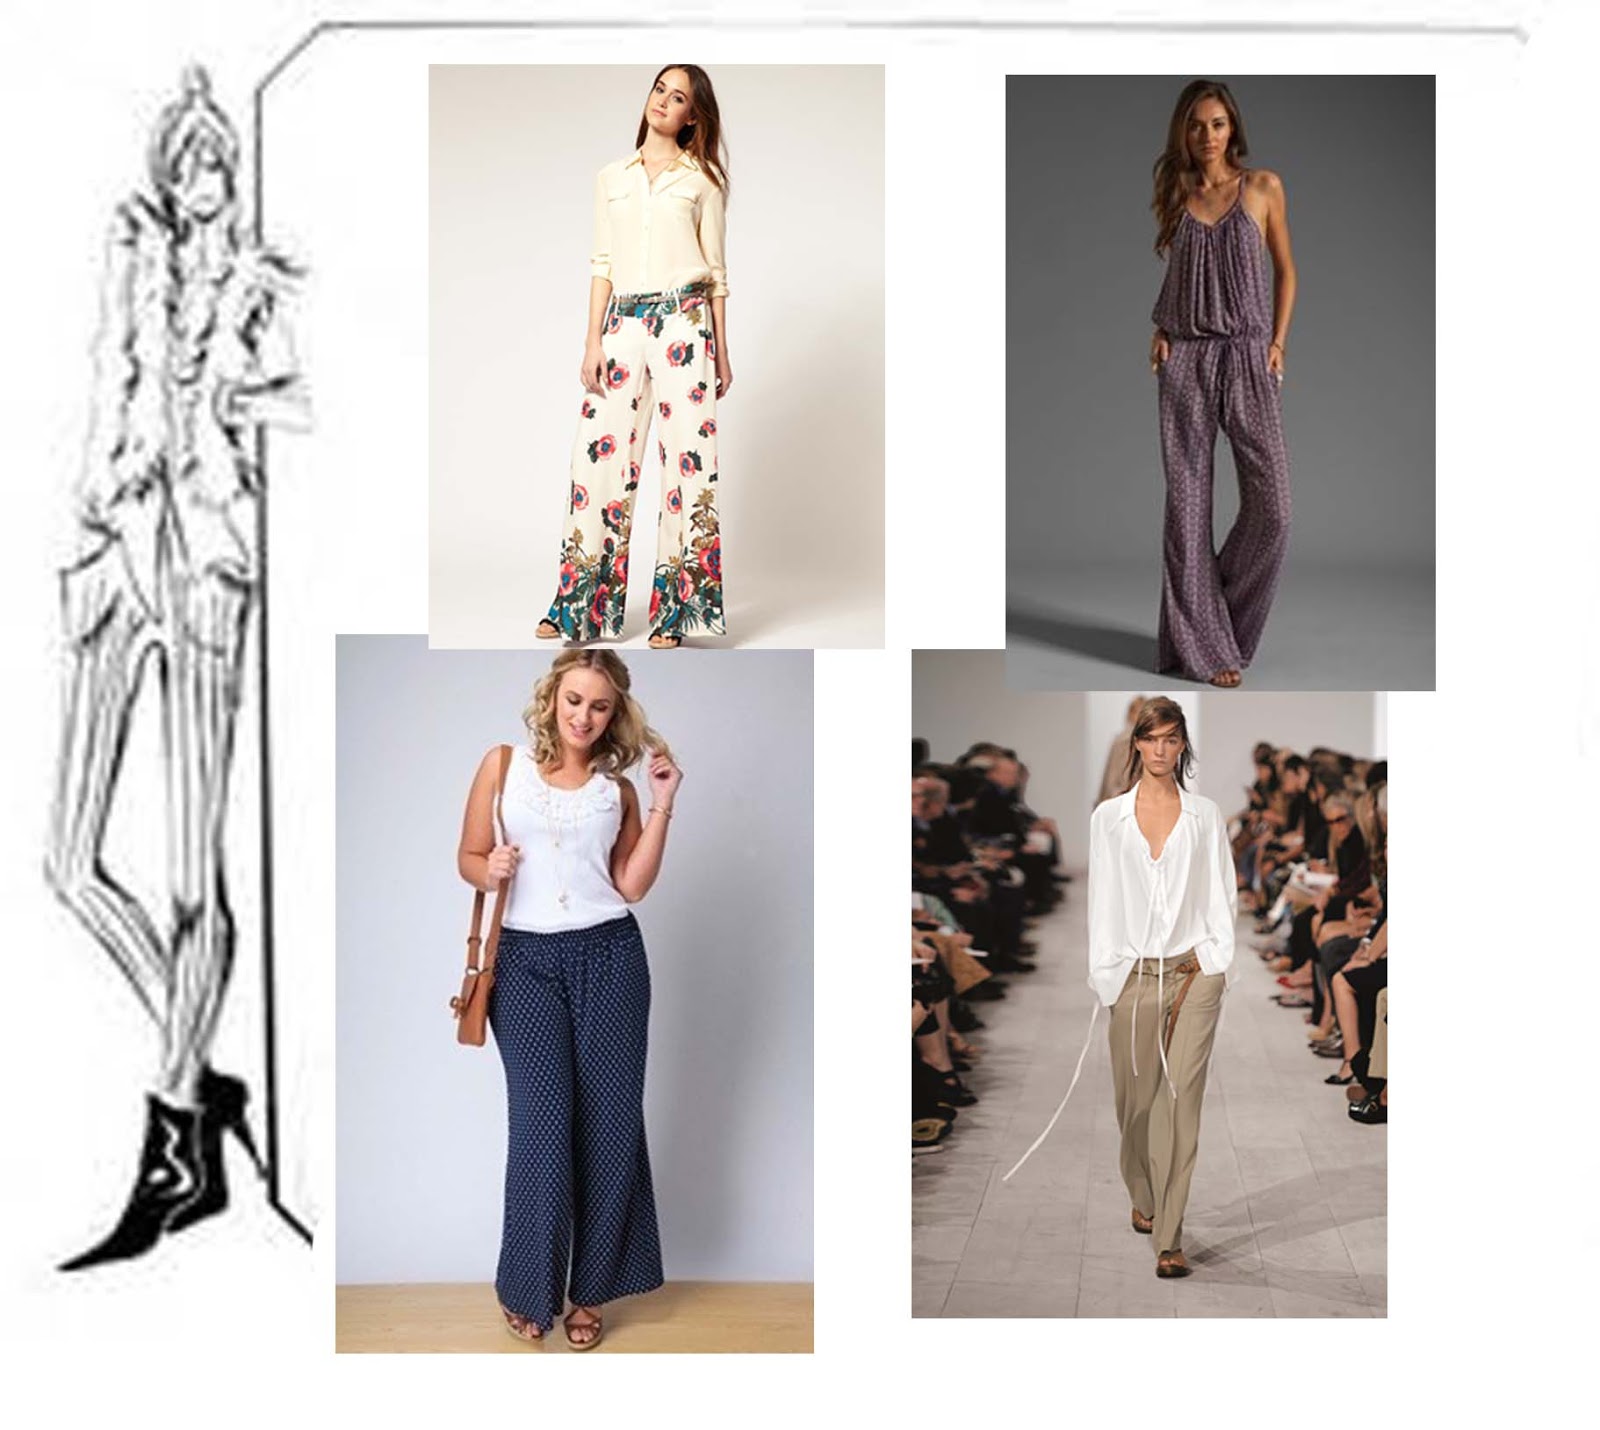
Bring out the palazzo pants and relaxed trousers, summer is all about taking it easy. 

This is a great trend on those hot summer days. Stay cool and comfortable with looser, airy garments and lightweight materials.

 
Mix and Match

When it comes to prints, don’t be afraid to mix and match. Summer is about having fun, so have some fun with your wardrobe! Find new outfit combinations you might not have considered before...and what better way to experiment with this daring trend than with great finds at Goodwill!


Whatever your style is this summer, be sure to check out Goodwill for the latest in trends and of course, AMAZING finds! 

    ...and Haleigh!

Tuesday, August 25, 2015

7 Easy Upcycle Projects for Fall


Do you love decorating for Fall as much as I do? Of all the seasons, this one is my favorite and I love that you don't have to spend a lot to make a beautiful impact on your home during this season. Nature brings so many free and fun elements to your home decorating. Pairing these with a few simple upcycle DIY's, you don't have to spend a lot to make your space cozy and beautiful.

Today I want to share with you seven easy upcycle projects you can try to make yourself and your home cozy for Fall. These projects were selected with your Goodwill shopping in mind and should be easy to execute with some commonly found items at our store!


Transform Book Pages Into a Wreath

Book page projects are always my favorite and I just love this easy DIY Paper Leaf Wreath created by Nalle's House as a whimsical element of decor to a door or window in your home. I particularly love that she uses a fallen leaf as a template to create a rustic feel to the wreath and the addition of fallen acorns really embrace the natural elements of autumn.


Turn Sweaters Into Cozy Legwarmers

Living in Indiana, a girl can never have too many layers in the colder months. I love a good legwarmer or boot cuff to add a touch of color and warmth to my wardrobe. Lucky for you, sweaters are available in every color of the rainbow at Goodwill. As Svetlana HillKovich Photography explains in her easy tutorial, this is a simple no-sew project since no one will ever see what's lurking underneath your boots if you don't feel like making a finished edge. So cute AND easy!


Add a Little Pottery Barn Style

Wouldn't we all just love to fill our homes with everything from Pottery Barn? I know I would, but just can't justify the expense especially when it comes to simple seasonal decor. Live Laugh Rowe replicates these elegant mason jars filled with seasonal filler and votives for families on a budget. Glass jars are always something I can snag at my store and filler for these can be purchased at your local craft store (with a great coupon, of course!) 


Create a Book Page Pumpkin

I am always looking for thrifty seasonal touches to add to my bookcases and shelves. Consider making a simple book page pumpkin out of a book from Goodwill and finish it with a little twine and twig to complete the rustic look. If you select books in different sizes, you could create a beautiful coffee table display for your home! Check out this easy step-by-step tutorial from Red Ember to create one of these (or ten!) for your own home! 


Add a Fall Touch to a Mug

It is rare that I stop in the store and can't find a few white mugs for my DIY projects. I have transformed many a mug into a beautiful gift and I love the idea of adding a fall touch to these Goodwill treasures with a simple stencil. Since these are a rub-on transfer (versus a permanent paint transfer) consider using these as a place to tuck your toothbrushes, to fill with a treat for a teacher, or plant a little succulent to place next to a kitchen window! You can get the scoop on this easy stenciled mug over on Callaloo Soup. 


Add Simple Details to a Faux Pumpkin

Although I love a glitzy pumpkin, my eye is drawn to these simple Baker's Twine pumpkins because they create such a beautiful detail with such pretty lines. If you aren't crafty, this is the perfect DIY project for you and just requires a little wrapping of twine to complete. This project is so easy, you can enlist your kids to help you!  Check out Design Improvised to see how to create these for your own home. 


Add a Tassel Detail to a Cozy Throw

I am absolutely nuts about tassels and how they can transform anything from clutches to necklaces to pretty trims. A basic vintage throw from Goodwill can be taken up so many notches with a beautiful tassel detail. Design Sponge shows you how beautiful this detail can be in cozy neutrals for the fall season. I'm dying to replicate this project for our home, aren't you? Get the easy tutorial over here today! 

What is your favorite upcycle project that you have done for Fall? Feel free to leave your ideas in our comments below!


Monday, November 10, 2014

DIY Jewelry Organizer


One of the things I seem to struggle with is wearing all of the great accessories I've collected over the years.  It seems I always wear the same few pieces...because I can see them, they are on top of the pile (know what I mean?).

The notion of being able to see all of my jewelry coupled with a good storage option has been something I've been frustrated with for a long time.  I've tried hanging everything on a necklace tree, I purchased a piece of furniture that held my jewelry, I even invested in stack-able trays thinking that was the ticket to storing all of my jewelry pieces.

None of those things worked.

When a modern mom has a problem like this, what does she do?  She turns to Pinterest of course!  I saw some DIY jewelry organizers that I thought might work, so I decided to make my own.  And I must say, it is working very well!  The best thing about this DIY project is you don't have to be crafty or own a bunch of tools to have a great looking final product.


DIY PICTURE FRAME JEWELRY ORGANIZER


STEP 1
First, head to your local Goodwill store and find a picture frame that you love.  It doesn't matter what is inside (what the picture is), just look for a decorative frame (or maybe something simple) that will match your decor. The best frames for this project will be large bulky frames.  Look for something that is made of wood  and that is at least 1 1/2" thick. I found 3 frames to use for this project.  Two smaller frames (about 8x10), and one larger frame (about 24x30).  I will use the smaller one for bracelets and earrings, and the larger one for necklaces.

STEP 2
The second step is to head to a craft store or hardware store.  I stopped by a hardware store and purchased $14 worth of supplies.  They include:
  1. A variety of small 'S' hooks
  2. A roll of chicken wire (sometimes called Hardware Cloth)
  3. Some heavy duty thumb tacks
STEP 3
Prepare the picture frame by removing all of the backing.

Next, measure how much of the Chicken Wire you will need to cut to fit the frame.  I cut the piece to fit the back of the frame, leaving about 1/4" border. Using wire cutters (mine are technically floral cutters), trim a piece of the Chicken Wire to fit the back of your frame.

STEP 4

Affix the backing using a hammer and the large thumb tacks.  Next, using the 'S' hooks, plan how you will organize your jewelry pieces on the frame. It is OK if the chicken wire is a little loose, or not flat.  If the wire is flat against the wall, it will make it harder to hang the 's' hooks.

I didn't finish the edges of mine, but I think I might add some heavy duty tape (like packing tape) to the edges on the back of the frame. This will help secure the wire to the frame, and protect the wall from the raw edges of the wire.

Step 5

The last step is to nail your jewelry organizer to the wall.  I used 2 basic picture hanging nails. Enjoy seeing all of your jewelry pieces neatly organized!  And the best part, it takes up unused wall space in your closet! BONUS!


Saturday, February 22, 2014

The Little White Dress - DIY Wedding Dress


Have you ever considered creating your own wedding dress?

I read somewhere that a $10,000 wedding is a good budget to keep in mind for a conservative wedding. WHAT?  Who has THAT kind of money in today's economy. Most of us can afford closer to $100...and that is a few zeros away from the $10K mark.

This grand number got me to thinking...how can brides save some money planning their wedding?

We all can agree one of the most important aspects of the wedding (along with the bride and groom) is the wedding dress. This is also one element that consumes a lot of the overall wedding budget. What if I told you that you can make your own wedding dress and save THOUSANDS of dollars?

 Love the ideas on this blog for DIY wedding dresses...YES, you read that right...Do It Yourself Wedding Dress!  I especially love the advice on this blog that says:

2. Give Life to a New Dress

Have you come across a dress you absolutely love, but there is something about it that you don't like? Well, instead of passing this by, get it! You can easily breathe new life into a dress and turn it into something all your own. For example, you could add tulle to the bottom of a dress to make it more like a ball gown. Or you could even shorten a dress so it's more casual.
If you aren't able to do these things on your own, then you better find a good seamstress in your area. This professional can make just about anything happen as long as you give them enough time to do so. Your ideas with a dress can come to life, but you have to make sure you use a pro who can actually help you get to the end result that you want.
A lot of brides are choosing to give dresses new lives because it can save them so much money. For example, some brides use their mother's wedding dress and simply have it changed to be the way they would like. A lot of alterations can be made to create a dress that really fits your every desire.
- See more at: http://www.weddinggownpreservationkit.com/wedding-dress-options-create-pm-22.html#sthash.6Bbiqpi6.dpuf

"Give Life to a New Dress"
Have you come across a dress you absolutely love, but there is something about it that you don't like? Well, instead of passing it by, get it! You can easily breathe new life into a dress and turn it into something all your own. For example, you could add tulle to the bottom of a dress to make it more like a ball gown. Or you could even shorten a dress so it's more casual.

If you aren't able to do these things on your own, then find a good seamstress in your area. This professional can make just about anything happen as long as you give them enough time to do so. Your ideas with a dress can come to life, but you have to make sure you use a pro who can actually help you get to the end result that you want.
A lot of brides are choosing to give dresses new lives because it can save them so much money. For example, some brides use their mother's wedding dress and simply have it changed to be the way they would like. A lot of alterations can be made to create a dress that really fits your every desire.

I found a few other blogs with great ideas, pictures and step-by-step guides for creating the wedding dress of your dreams...ON A BUDGET!

OTHER DIY WEDDING DRESS BLOGS:
http://www.care2.com
http://www.abeautifulmess.com
http://makezine.com


Have you heard?  You can have your dream wedding or host a dream event on a budget!  See you at this amazing event sponsored by who else?  Goodwill!


Friday, January 31, 2014

8 Beautifully Frugal Valentine's Day Projects


Valentine's Day is just around the corner and one of my favorite things to share here on the Goodwill Tips Blog is frugal ways to celebrate the holidays using items from your local Goodwill Store. You may have thought last year's DIY Valentine's Day Projects post couldn't be topped, but I think today's projects are going to rival all that I shared last year. The best part is that they are both beautiful AND frugal- a total win for my wallet and my home!

Let's get started with this year's featured projects!


DIY Valentines Day Bow Tie


I am a total girly-girl so I am absolutely dying over this adorable Valentine's Day bow tie on Plan B. You only need a few craft supplies and a men's necktie to create this look. If a pink tie hasn't been donated to the store, look for a red tie or anything in those festive red & pink colors. Pair this with a lacy blouse and your best boyfriend blazer for a cute night on the town.

If you can't locate a bow tie, hunt for a red, pink, or white blouse and try my frugal DIY Rosette Necklace for an adorable addition to your favorite jewelry pieces.


DIY Coffee Cup Wrappers


I love a good free printable and am madly in love for these Valentine's Day cup wrappers. Travel mugs are something that I often see in abundance at our local Goodwill. How sweet would this thrifted gift be with a little lovable printable on the outside and filled with their favorite coffee for someone you love, heading off their morning commute? In my mind, the ultimate sign of love is a cup of coffee, don't you agree? Grab this free coffee sleeve printable from Eat Drink Chic today!


DIY Sequined Heart Shoe Accents


Last month we talked about how easy it is to make your own sparkled set of shoes from a pair of Goodwill shoes. To take this a step further towards Valentine's Day festivity, check out this easy sequined heart shoe accent you can make from At The Picket Fence. I know I have one adorable little girl who would absolutely love this heart accent and it would be a fun & inexpensive craft we could do together too!


DIY Coloring Page Valentine's Day Printables


I am all about free printables for celebrating the holidays and am madly in love with this, "I Love Everything About You," printable from Tried & True for a couple of different reasons. Besides this printable being free, it is actually a coloring page that you can fill in with your own favorite colors or you can have your kids do for a fun Valentine's Day activity.

Just pick up a frame or clipboard for displaying these, from your Goodwill store, and you will have something beautiful to decorate a wall, mantle, or nightstand.


DIY LOVE Planter


One donated item that I always can easily find at my Goodwill store is an abundance of white mugs. When I see these, I immediately snap them up because there is so much you can do with these $.25 wonders.

If you are looking for a fun way to add a little festivity to your home, add a LOVE splash by using one of those mugs as an adorable planter for the Valentine's Day season. Not only is this a cute addition to your home, but would make a fantastic last-minute gift for someone you love! Check out Lacquer & Linen and this easy tutorial for this fun DIY LOVE planter!


DIY Big Bow Pillowcases


Although I don't sew, I know many of you do, and I truly admire you! For those of our readers that do have the sewing gene (you, lucky people, you!) here is a fun tutorial from raegun ramblings for how to create your very own DIY Big Bow Pillowcases to add a little festivity to your home. 

To create these, visit your local Goodwill Store and purchase linens, sheets,  or the largest shirts you can find in your favorite festive colors. Use this material to create your own pillowcase covers for Valentine's Day.


DIY Valentine's Day Centerpiece


If you are looking to add a little festivity to your dinner table or mantle, you will love this easy project created from a little vinyl and any type of glass item/jar that you can find at your local Goodwill store.  

One Artsy Mama offers this free downloadable heart image that you can use to create your own vinyl masterpiece for your table. Fill your jar with festive conversation hearts and you have a fun & frugal centerpiece that you can use every year!


DIY Heart Sleeve Detail


I have been known to wear my heart on my sleeve so this project is perfect for a girl like me! Just visit your local Goodwill for a shirt, cardigan, or sweater you can add your heartfelt detail on  and use these easy directions from hey love designs for creating an easy felt detail to your sweater.

This would be a fun one for a little girl in your life too and takes minimal sewing skills (yay, for those of us that dropped out of sewing school!) to make this sweet little project!

Happy Valentine's Day, everyone!